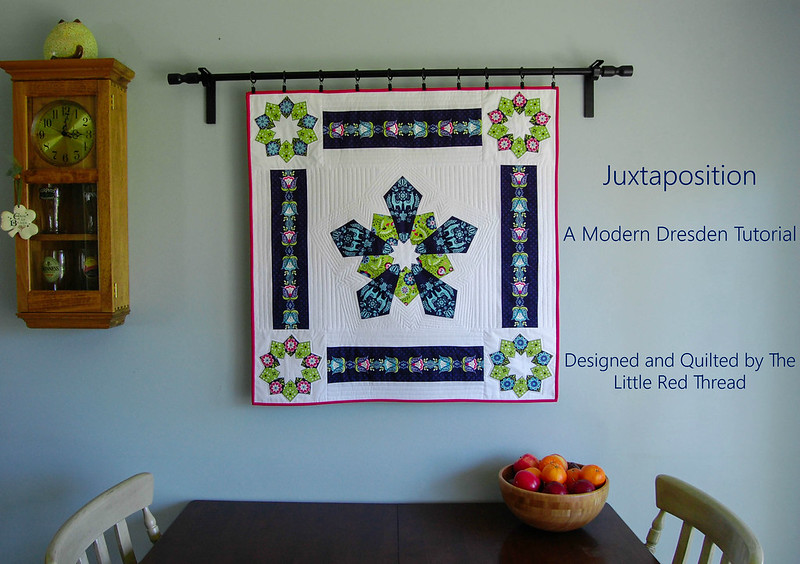
Juxtaposition: A Modern Dresden
Designed and Quilted by Rebekah Taylor of The Little Red Thread
Finished Size: 34 x 34
I had the honor of designing another fun project from Betz White’s newest fabric line Juxtaposey for Riley Blake. The color in this line is LUSCIOUSLY saturated. They range from bold red and gold to fuschia and navy. There is something for everyone’s palatte in these eccletic world-inspired designs. And guys, there are llamas.
L-L-A-M-A-S
Nevermind that one of my favorite movies is the Emperor’s New Groove or the fact that I have several llama figurines. I mean who knew llamas were such a popular, lovable animal? So when Betz asked if I wanted in on designing another project for her latest line there was no hesitation.

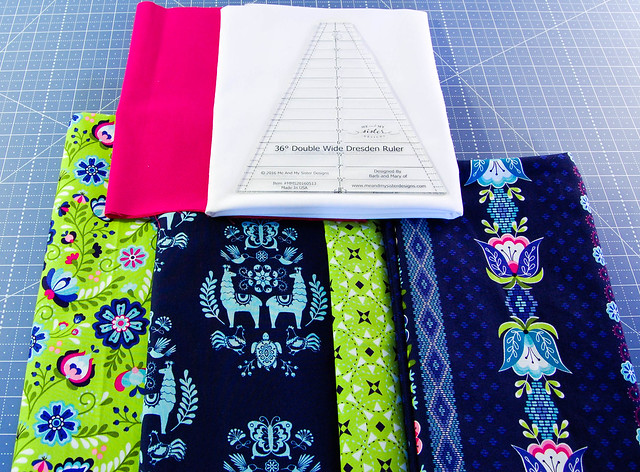
This pattern was designed using the Double Wide Dresden ruler by Me & My Sister Designs. All fabric requirements are based around the use of this ruler. The Double Wide ruler allows you to use only 10 fan blades to complete a circle verses a traditional Dresden ruler where you have 20 blades. Because you are doubling the width of the fan blade these dresdens are not only made faster but are finished at both ends eliminating the need for a center circle.
SUPPLIES
Fabric:
¾ yd Posey Stripe Navy (tulip stripes and small dresden blades flowers)
½ yd Posey Medallion Navy (large dresden blades)
¼ yd Green Posey Main (medium dresden blades)
¼ yd Posey Star Green (small dresden blades)
1 ¼ yds Solid White (background)
1 ¼ yds White (backing)
¼ yd Pink (binding)
Notions:
Double Wide Dresden Ruler by Me & My Sister Designs
Thread
Scissors
Turning tool/chop stick
Iron
Spray starch
Basting supplies
———–
All pieced seams are sewn with 1/4″ seam allowance
All seams are pressed opened to reduce bulk
Blade Cutting
———————
Center Dresden:
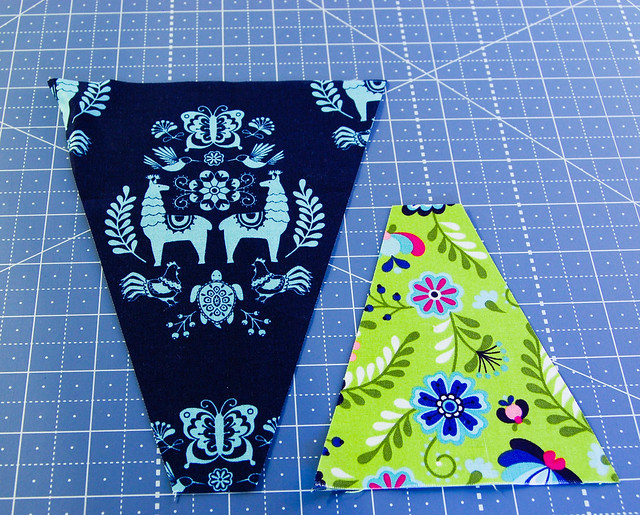
1. Cut an 8” wide strip of the Posey Medallion Navy aka The Llama Medallion. Line up the 8” line at the bottom of the ruler onto the edge of your fabric, centering a llama medallion as best you can. Cut 5 large blades.
2. Cut a 5” wide strip of the Green Posey Main. Line up the 5” line at the bottom of the ruler onto the edge of your fabric. Cut 5 medium blades.
Corner Dresdens:
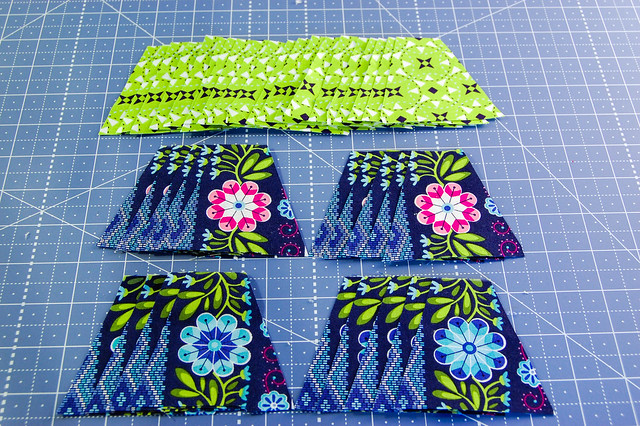
3. Cut a strip of the posey flowers off of the Posey Stripe Navy, then carefully fussy cut the pink and blue flowers using the 3” line on the Double Wide Dresden ruler as a guide. Take your time, this is the hardest part. You may find that you will need to cut another strip to find enough usable flowers. Cut 10 small blue flower and 10 small pink flower blades.
4. Cut a 3” strip of the Posey Star Green then using the 3” line on the ruler cut 20 small blades.
You will have a total of 40 small dresden blades.
Dresden Assembly
——————————
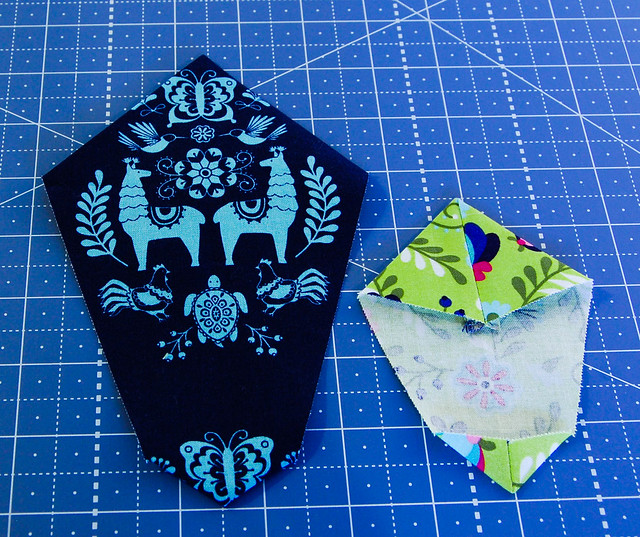
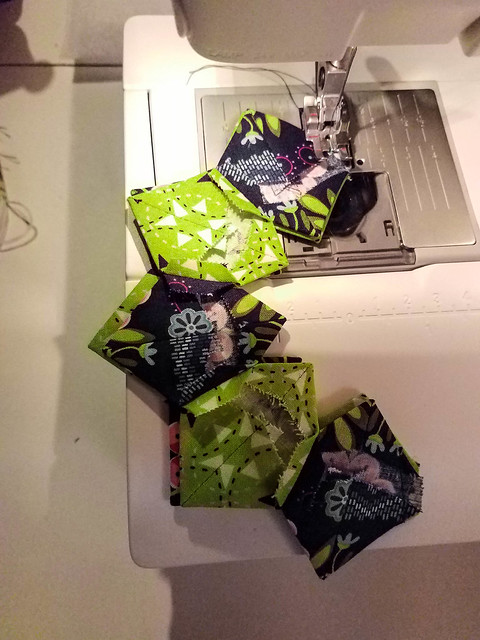
1. Take a fan blade and fold it in half lengthwise. I like to give mine a quick press with my iron to crease the fold line, finger pressing works well too. Sew ¼” at the top and bottom of the blade. Clip the inside corners just enough to reduce the bulk being careful not to cut through your stitches.

Press open the seams on each end of the blade using your fingers then turn each end right side out. A turning tool or chopstick is especially helpful for poking out the points, be gentle so you don’t push through the ends!
2. Flip your blade so the back is face up and line up the seams you finger pressed open on the center fold line you creased in step 1. This centers your points. Carefully press them flat with your iron and a bit of steam.
Continue steps 1-2 until all your blades are done.
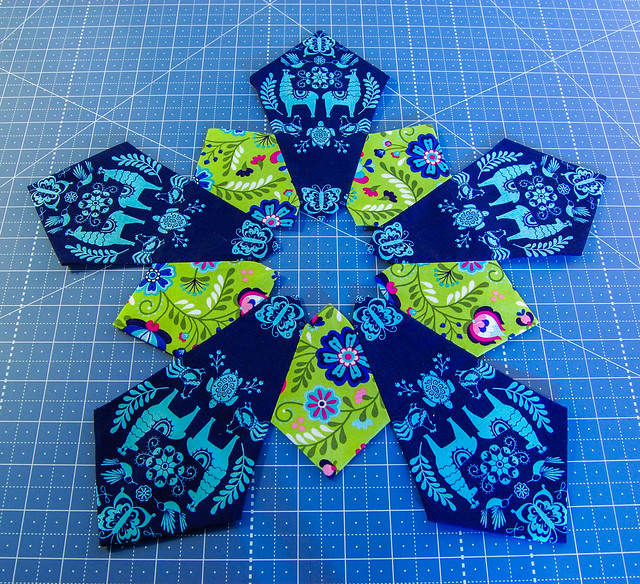
3. When all your blades have been sewn and pressed, arrange 10 blades to form a dresden plate in the pattern you like best. For example, for the corner dresdens I used the green print then a blue/pink flower and alternated between those for the corner dresdens.
4. Starting with one dresden plate, take two blades place them right sides together and sew them together starting at the bottom end of your seam. As the center of this dresden is exposed rather than hidden your eye looks to the center first. Sewing from the bottom up will also keep your center points aligned all the way around.
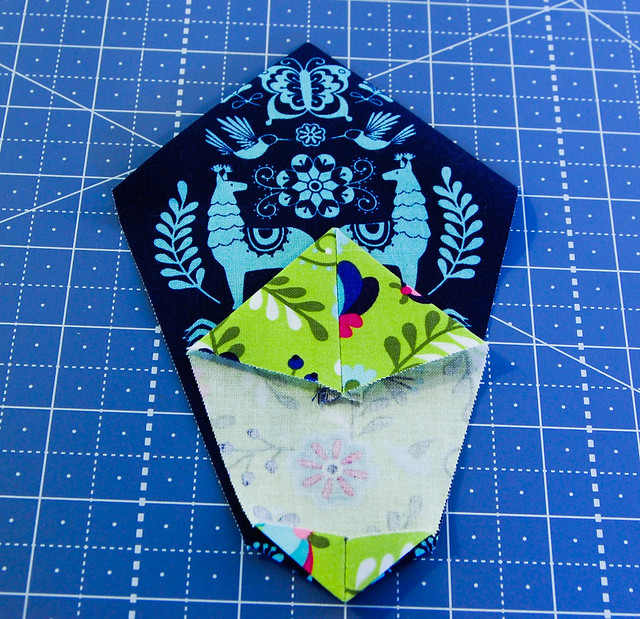
*Tip* On the Center Dresden one blade is larger than the other. To keep the exposed sides tucked under on the larger blade go ahead and continue to sew the whole side once you pass the end of the medium blade seam. When you press your seam open the stitch lines will create a natural exact ¼” for you to press under.
5. Sew and press your blades in groups of 5. For the Center Dresden you will have alternating sizes.
6. Once you have all your blades sewn in groups of 5, take 2 matching blade groups and place them right sides together. Sew from the bottom up, press open and you will have a finished dresden!
Repeat steps 1-5 (3) more times for a total of 4 small corner dresdens and 1 large center dresden.
Attaching the Dresdens
————————————–
1. Cut one large 19” x 19” square and (4) 9” x 9” squares from your white background fabric.
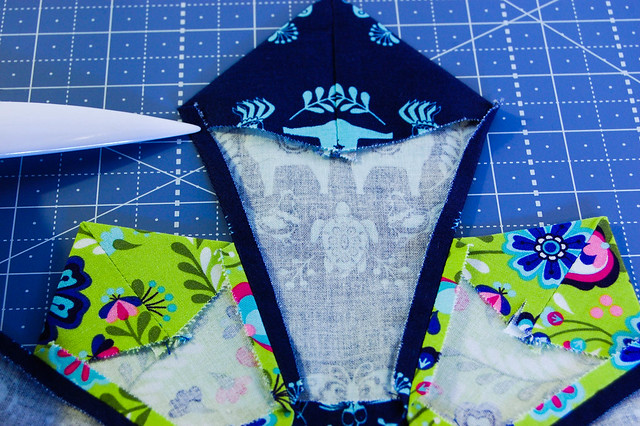
2. Fold your squares into fourths and press the center just enough to make light creases. When you open them up you’ll have your exact center for each block. Use the center points and crease lines to line up the Center Dresden on the 19” x 19” block. Pin in place being careful not to shift it too much. Do the same for the (4) Corner Dresdens.
3. Sew on the dresdens to the background using any stitch you’d like. I used a machine blanket stitch.
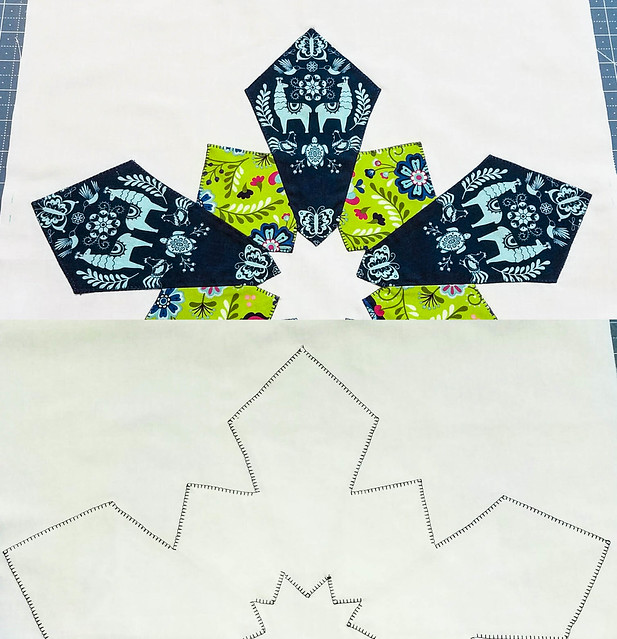
4. Lightly press your completed dresden block and measure your block again. It may have shrunk ever so slightly (especially if you used a blanket stitch).
Square down your Center Dresden to 18 ½” square and your (4) Corner Dresdens down to 8 ½” square. Take your time doing this and always measure twice before cutting.
Set squared blocks aside.
Tulip Border Assembly
———————————–
1. Using the Posey Stripe Navy fussy cut a 4 ½” wide strip of tulips the width of your fabric. Cut 2 long strips. Cut each strip into 18 ½” lengths for a total of (4) 4 ½” x 18 ½” long tulip strips.
2. Using your remaining white background fabric cut (4) 2 ½” x 18 ½” long strips.
3. Sew one white border strip to one tulip border strip, press seam open. Then sew a second white border strip onto the opposite side of the tulip strip. Press seam open.
Make 4.
Quilt Top Assembly
——————————–
Layout your top using the finished picture as reference.
Start by assembling the Corner Dresden blocks and Tulip borders into horizontal rows.
1. To create one horizontal row take one Corner Dresden keeping your center point pointing up and sew one Tulip Border to the bottom of the Corner Dresden block, press open. Take a second Corner Dresden, with the center point pointing up and sew that to the bottom of the Tulip Border.
Each Corner Dresden block should have its center points oriented in the same direction.
Make 2 rows like this.
2. To create the middle row take one Tulip border and sew it to the top of the Center Dresden (make sure your Center Dresden’s center point is oriented up), press seam open. Sew the remaining Tulip border to the bottom of the Center Dresden and press seam open.
3. Sew the Corner Dresden rows to the middle row, press seams open.
Finishing
—————
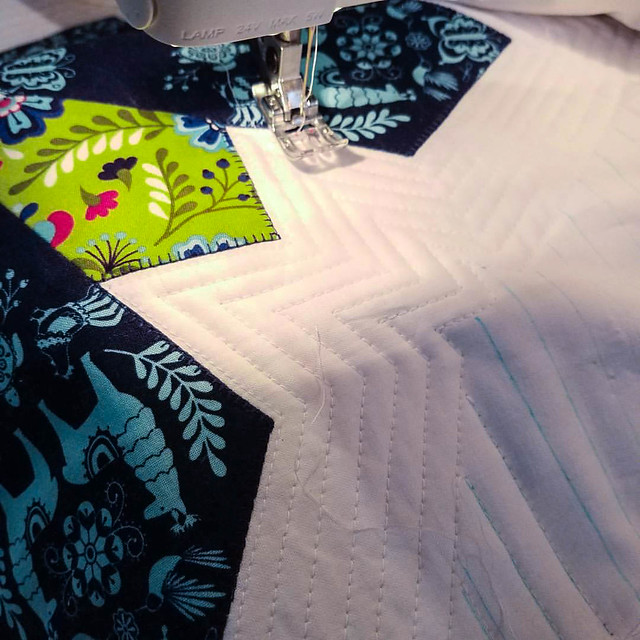
1. Make your quilt sandwich (quilt top, batting, backing) and baste together using your favorite method.
2. Quilt! Quilting doesn’t need to be super fancy to have a wow factor. Sometimes straight lines carry a big punch.
3. Cut 4 strips 2 ¼” wide the width of fabric from your pink fabric for your binding. Attach binding.

Hang your new wall hanging in a favorite spot and enjoy! If you like how the one in the picture is displayed you can purchase the curtain rod and hangers at Ikea.

I hope you loved this new pattern! It was quite a challenge to design but I learned so much from making this and I have found a new love for all things Dresden. Thanks also to Riley Blake and Betz White for providing the amazing fabric used to create this project!
Remember this pattern is free for personal use only, please respect copyright laws.
Happy Sewing!